Vesta Control Panel Tutorial Series – Create Website
Clark’s Hosting currently only available in Taiwan!
If you are the customer of Clark’s Hosting Service, you would know that we are the first Hosting Service use Vesta Control Panel in Taiwan. And also our Editor in Chief is the Translator for Vesta CP in Traditional Chinese, so our service will always get the latest update in Traditional Chinese (BC we install it right after we check and test the translation). Let’s start with today’s tutorial.
First of all, you will need to apply for Clark’s Hosting Service, after your application approved you will receive an email about you login information.
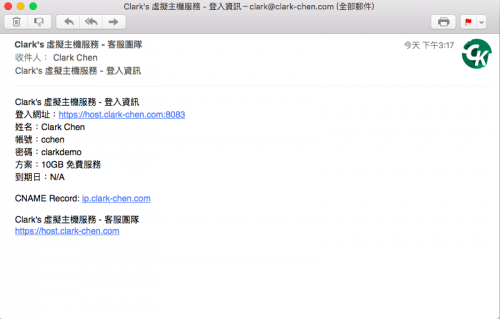
Use the login information you receive at the login page

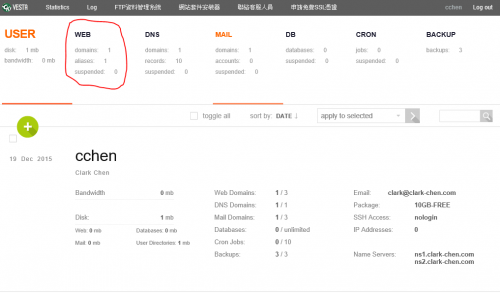
After you got into the control panel click “Web”
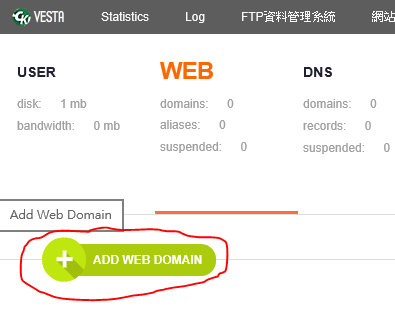
Then click “Add Web Domain”
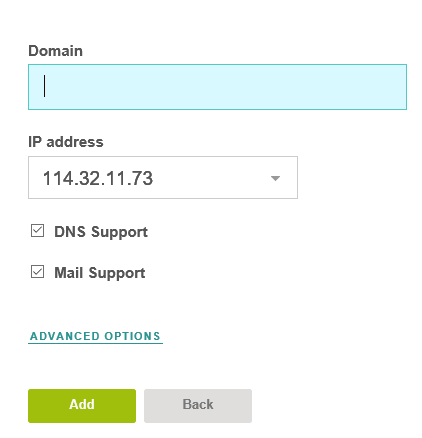
Fill in your domain name, and “Add”. Now your are done with the configuration on Vesta Panel!
Last step is to configure your domain’s DNS record to our Server
CNAME: ip.clark-chen.com

Your website should be all set by now! If your browser shows Server not found, you may check out our Google DNS Setting Tutorial to fix that problem!
- Clark’s Domain Management System Tutorial - April 5, 2017
- 【New Feature】Clark’s Domain Management System – Major update - October 31, 2016
- 【Tutorial】Cloudflare – The best tool for speed up your website - August 12, 2016